File Upload
In Files you can upload files, which can be used in test-cases for upload and download operations.
Create a new file
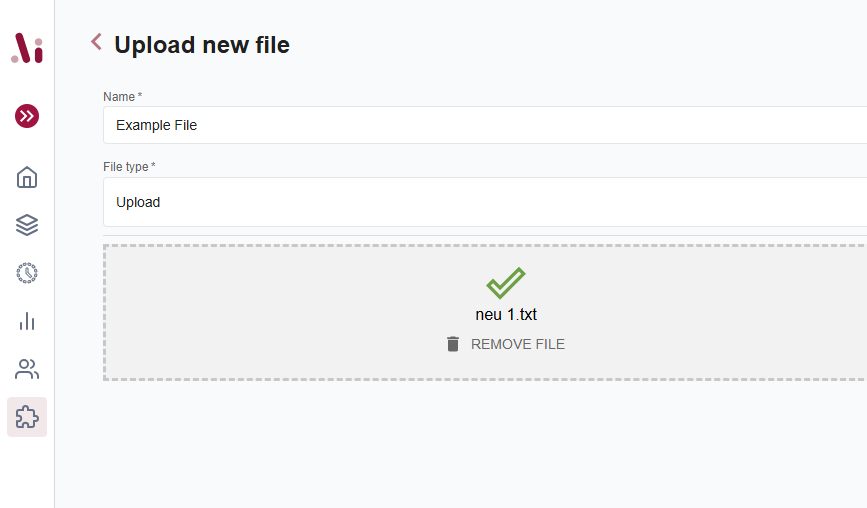
When creating a new file you can specify the following fields:
- Name: A unique name of the file, you are using in your test-cases. This name can be any identifier and does not necessarily have to be the actual file name.
- Usage-Type: How do you want to use the file? You can specify either upload, in case you want to use the file for uploading files in a test case or download, in case you want to use the file as validation for a download operation.
- File: The actual file you want to upload. You can either drag and drop the file or click on the upload area to select the file from your local file system.
The maximum file upload size is 5MB.
The files are available for all users which have access to the tenant. The files are stored in the tenant's storage and are not accessible to other tenants. Do not upload sensitive data or files containing sensitive data.
Edit an existing file
In the file details dialog you have the option to:
- Download the file: Click on the download icon in the header to download the current file to your local system.
- Update file metadata: Modify the name and usage type of the file and click "Save" to update the metadata.
- Replace file content: Click the "Replace" button in the footer to replace the file content with a new file.
- See where the file is used: A Usage References button in the editor lists every test that currently references the file — useful before replacing or deleting it.
Replacing file content
When you click the "Replace" button:
- A file picker will appear allowing you to select a new file from your local system
- The file name, size, and type will be automatically updated to match the new file
- You can still modify the display name and usage type before saving
- Click "Replace file" to upload and replace the content, or "Cancel" to exit replace mode
- The same file size restrictions as during file creation apply (maximum 5MB)
When replacing a file, only the file content and metadata (name, size, type) are updated. The file ID remains the same, so any existing references in test cases will continue to work.
Usage of files in test cases
After upload a file, you can use the files in test-cases as described in the Prompting. Generally you have to assign the files to the test step via the Details dialog of the test step. In here you can select 1..n files. If during the step execution a file chooser dialog is shown, the selected files are automatically uploaded to the file chooser dialog.
In case you have more than one file assigned, you can either prompt for the file you want to upload by name or file-name, or all available files will be uploaded (multi-file upload).
It is recommended to do only one file upload per test step. If you need to upload multiple files, create multiple test steps.